 05-29-2008, 04:16 PM
|
#11 |
|
Super Moderator

Join Date: Jan 2007
Location: Dalton, GA
Posts: 3,996
|
Yeah. I cleaned it out and tried to open the direct link but I was blocked out of looking out it by my work server. I guess it's just something I'll have to live with while I'm here in the office.
Sorry for hijacking the post. :oops: Login or Register to Remove Ads |

|

|
|
05-29-2008, 10:48 PM
|
#12 |
|
Senior Member

Join Date: Aug 2006
Location: Tallahassee FL
Posts: 945
|
Re: Highway Bars
[quote="Orpheus"]Made my own highway bars for the bike. They're fully functional and look pretty nice (although I think I still need to make them a little more sturdy). Thanks to some innovative thinking by my neighbor and the metal working skills of my local ACE hardware, I can now stretch out while I ride. Stil not perfect, but pretty good for now.
Now that's custom. Very nice. |
|
|
|
|
06-14-2008, 07:11 PM
|
#14 |
|
Senior Member
Join Date: Feb 2008
Location: Arizona, Tempe
Posts: 174
|
Just re-did the highway bar. Not quite done yet but I'll post some pictures when I'm finished (probably tomorrow morning). I think it's a lot better now.
|
|
|
|
|
06-16-2008, 03:30 PM
|
#16 | |
|
Senior Member
Join Date: Feb 2008
Location: Arizona, Tempe
Posts: 174
|
Quote:
|
|
|
|
|
|
06-16-2008, 04:36 PM
|
#17 |
|
Super Moderator
Join Date: Jan 2007
Location: Dalton, GA
Posts: 3,996
|
The write-up with photos would benefit everyone.
Thanks |
|
|
|
|
06-16-2008, 07:02 PM
|
#18 |
|
Senior Member
Join Date: Feb 2008
Location: Arizona, Tempe
Posts: 174
|
Okay, just finished. Pictures first, write-up to follow.
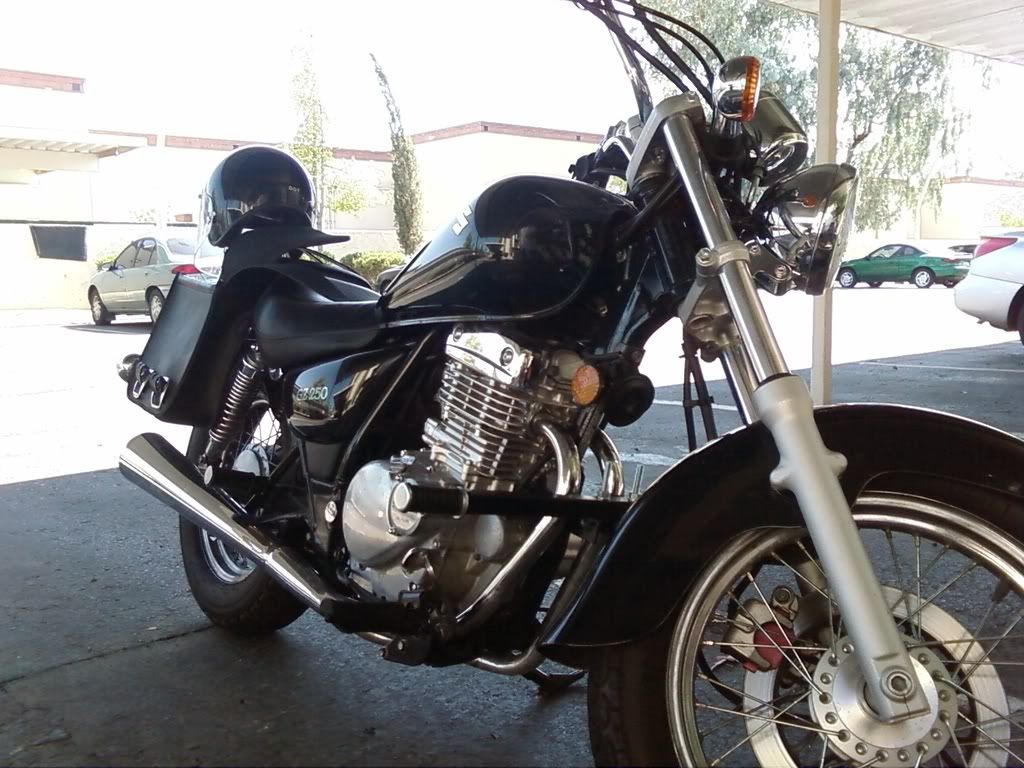 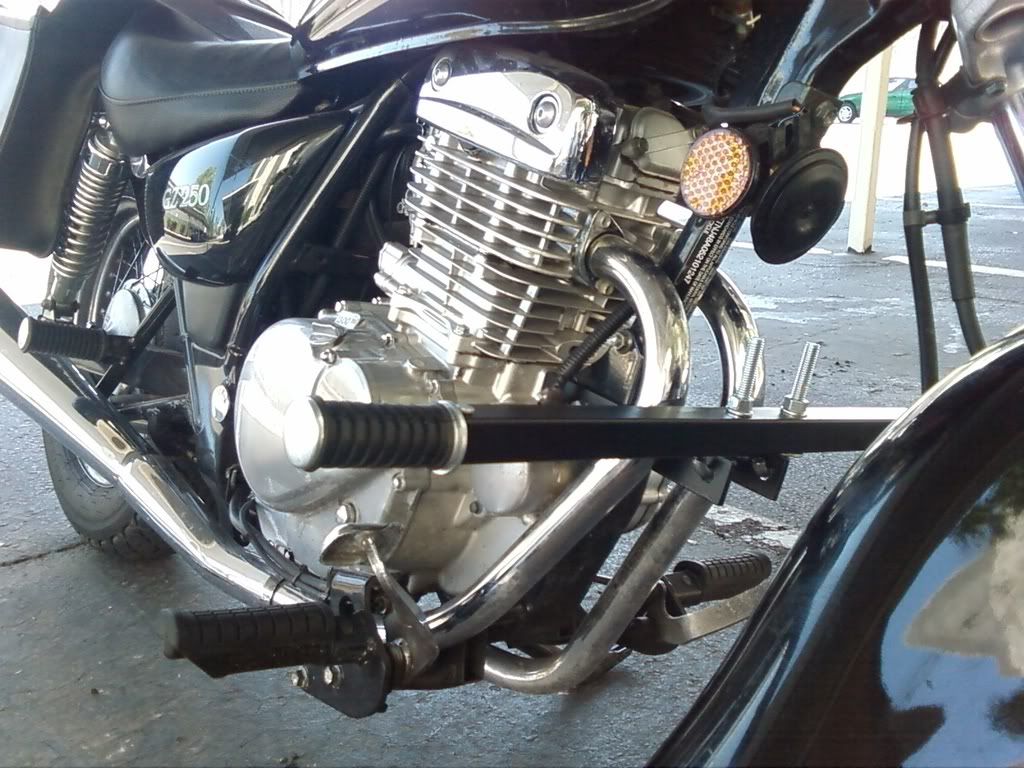 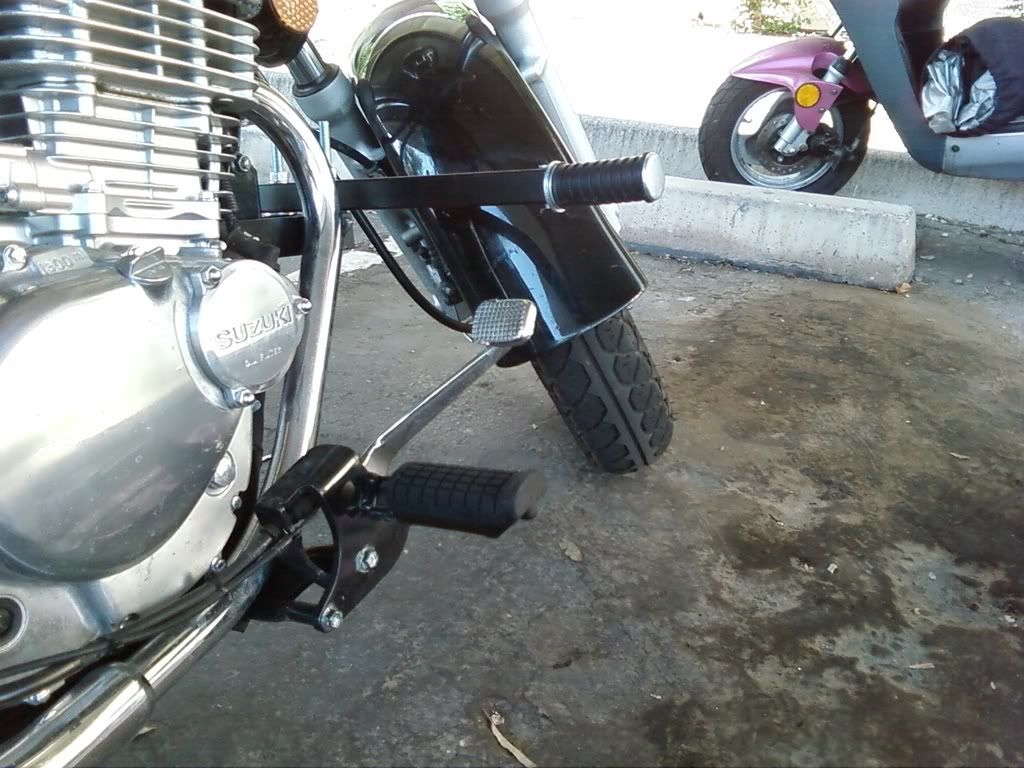 As you can see, the offset brackets and everything are traded for one piece of 1" diameter steel. Although the last setup was pretty comfortable, this setup is much more aesthetically pleasing in my opinion (and just as comfortable). What I did is I took the two flat rectangular pieces of steel that I had from the previous setup and attached them to the steel bar with j-bolts(which were ground down a little bit on the hook end). All the drilling and cutting was done for free at ACE Hardware, so I got away with the entire setup you see for about $30. If I had the tools and patience, I could have probably welded the steel parts together rather than using the j-bolts, but this seems pretty sturdy as-is. Here's the full description: I got a long piece of 1/8" thick steel from ACE. I had the guy there cut two 7" lengths out of it, and then drill one hole at the end of them and two holes at the other end for the engine mount bolts to fit through. Then, I got a piece of 1" diameter steel and had him cut it into a 20" piece (you could probably go as far as 24 or so inches before it started to look awkward on the bike). I had him drill two holes (roughly 2" apart) for the j-bolts to go through. I also had him drill holes for the clevis pin on the footpegs to fit through. I then had him grind down the j-bolts on the hook end, in order for them to fit better (not shown; you can just see the tops of the j-bolts coming out of the bar). Basically, I just painted it and slapped it all together for what you see above. If anyone's interested in doing something similar, pm me and I'll give better details. Oh yeah, I need to cut the tops of the j-bolts down a little too. Things I might change: As I said, I'd like to get the steel welded (or soldered) together, but I don't have the equipment or experience to really do it well, so I might not worry about it because it's pretty sturdy as-is; over the weekend, before I had everything really tight, one of my idiot coworkers laid my bike down and it rested perfectly on the bar, without scratching anything at all. He didn't fall at speed or anything; I was teaching him how to use the friction zone on the clutch and he lost his balance when he stopped (forgot to put his feet back down). There's barely any clearance between the mounting pieces and the exhaust, and I think it might start to scratch the exhaust unless I put some sort of high-temp tape or gasket between them. |
|
|
|
|
06-16-2008, 09:41 PM
|
#19 |
|
Super Moderator
Join Date: Jan 2007
Location: Dalton, GA
Posts: 3,996
|
That's very clean looking.
It's definately better looking than your first attempt. That's not to say that the first one wasn't good looking in it's own right, but this looks more complete. Nice work. I do have one question. Can you remove the exhaust without having to disconnect the highway bars? |
|
|
|
|
06-16-2008, 11:42 PM
|
#20 | |
|
Senior Member
Join Date: Feb 2008
Location: Arizona, Tempe
Posts: 174
|
Quote:
|
|
|
|
|
 |
|
|


 Linear Mode

